

One Leaf, One Life walkthrough
One Leaf, One Life quest guide: every phase, side story, and puzzle answer
Clear the One Leaf, One Life Lost Chapter in Kaifeng without backtracking. This guide covers the trigger, Feast of Leaves and Tale of Gold Leaves volumes, all white-leaf side stories, puzzle solutions, and the Huang Liang epilogue rewards so you can sprint to the Gold Leaf accessory and Gold Leaf Warrior title.
If you searched for the Where Winds Meet One Leaf One Life quest or its epilogue, this walkthrough keeps every time gate, side quest, and puzzle answer in one place.
- • TL;DR: Start at Hopewell Academy → follow Feast/Tale of Gold Leaves volumes → farm white leaves per phase → finish Huang Liang epilogue.
- • Time gates: Wu/You/Zi/Chen hours; leaf requirements 6/5/7 by phase.
- • Related quests: Woven with Malice · An Unholy Prophecy · check Roadmap for future tuning.
Quick facts
- •Start at the burning shop by Hopewell Academy, then follow Feast/Tale of Gold Leaves volumes in order.
- •Use side stories to farm the required white leaves between volumes; you need six in Phase 1, five in Phase 2, all seven in Phase 3.
- •Puzzle solutions are below—combine the listed phrases so you can keep moving without retries.
- •Final epilogue is Huang Liang at Every Hearth after To Feast and Forget, awarding the Gold Leaf accessory and title.
How to start One Leaf, One Life
In Where Winds Meet, go to the Hopewell Academy boundary stone in Kaifeng City. A burning shop and onlookers mark the trigger—talk to them to start Feast of Leaves: Volume 1. The chain splits into three phases and alternates between Feast and Tale of Gold Leaves volumes; between volumes you must gather white leaves from side stories to unlock the next step.
Keep an eye on the in-game clock: Wu and You hours gate major objectives, Zi hour gates a lamp side story, and Chen hour shows up later in Phase 2. Set the time manually to avoid stalls.

Phase 1
Strife in Every Corner (Where Winds Meet One Leaf One Life)
Complete both volumes, farm 6 white leaves, then finish the Strife finale.
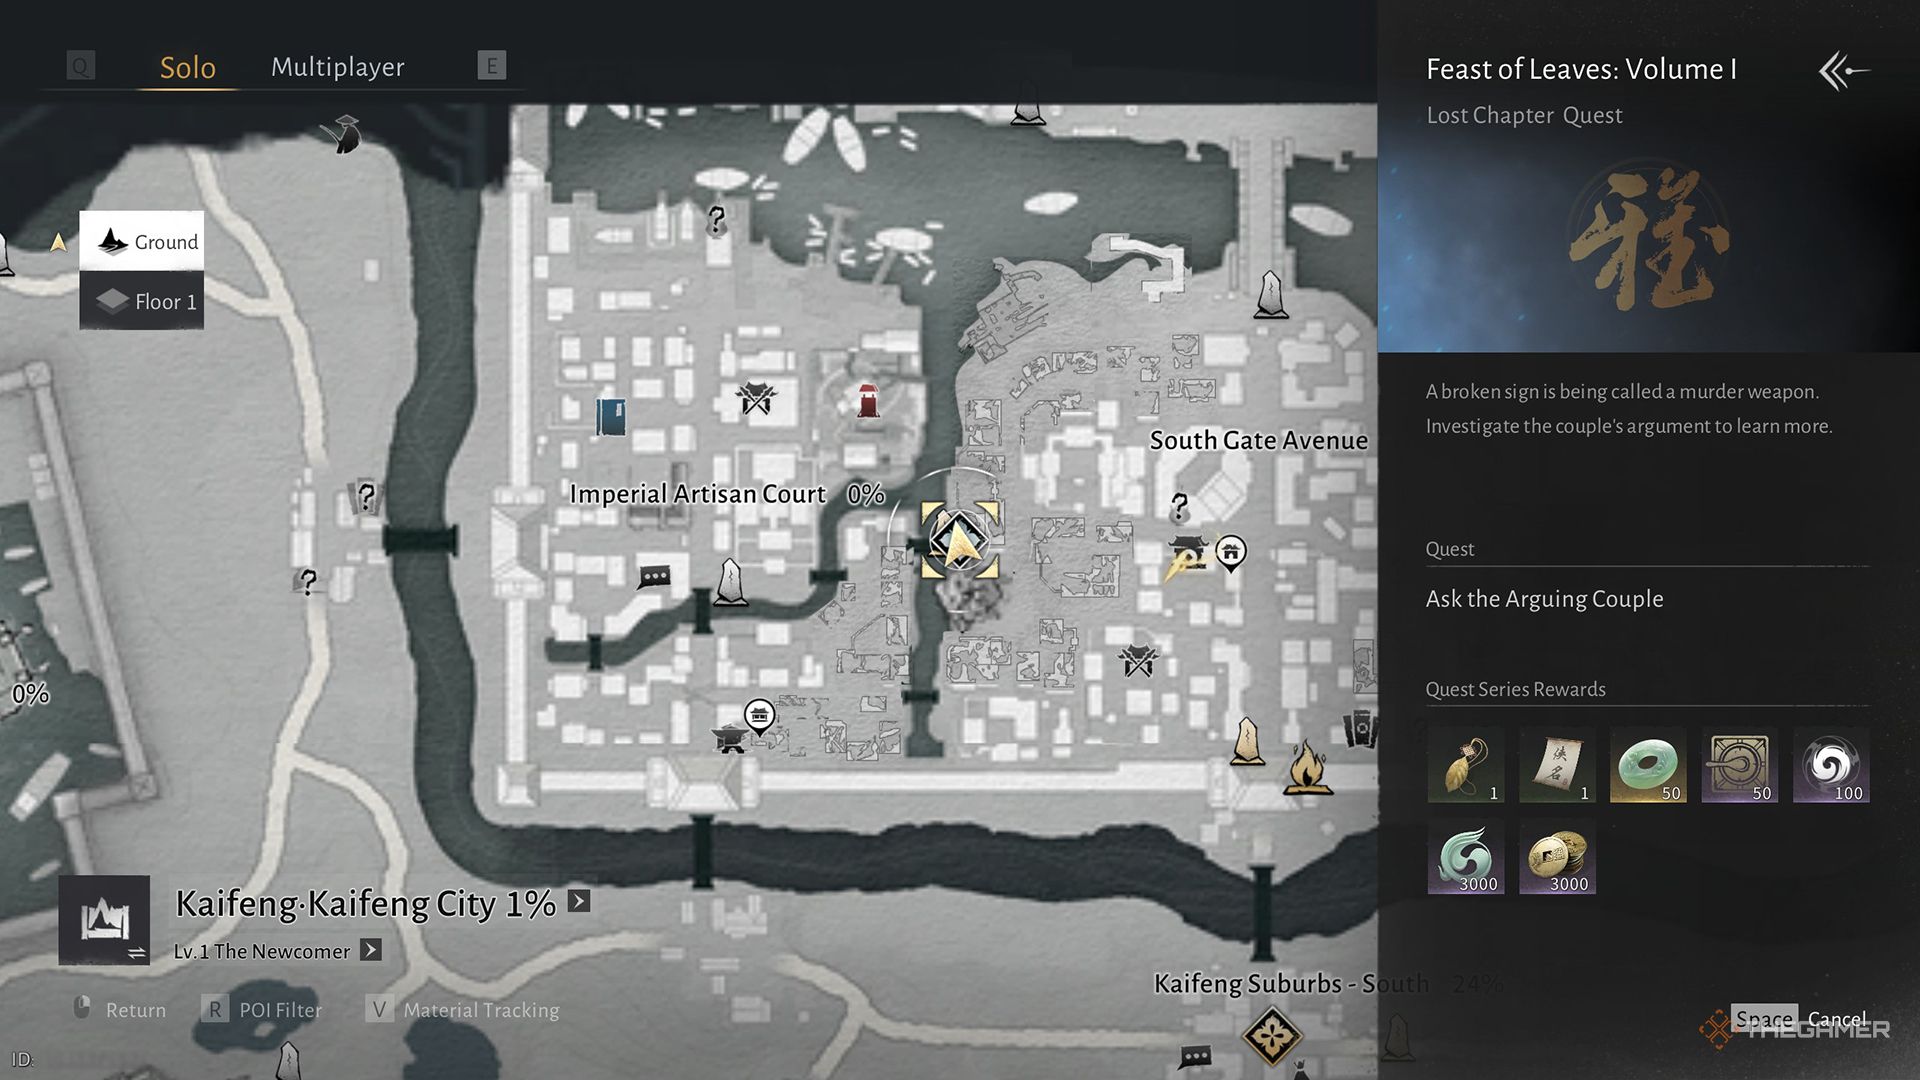
Feast of Leaves: Volume 1
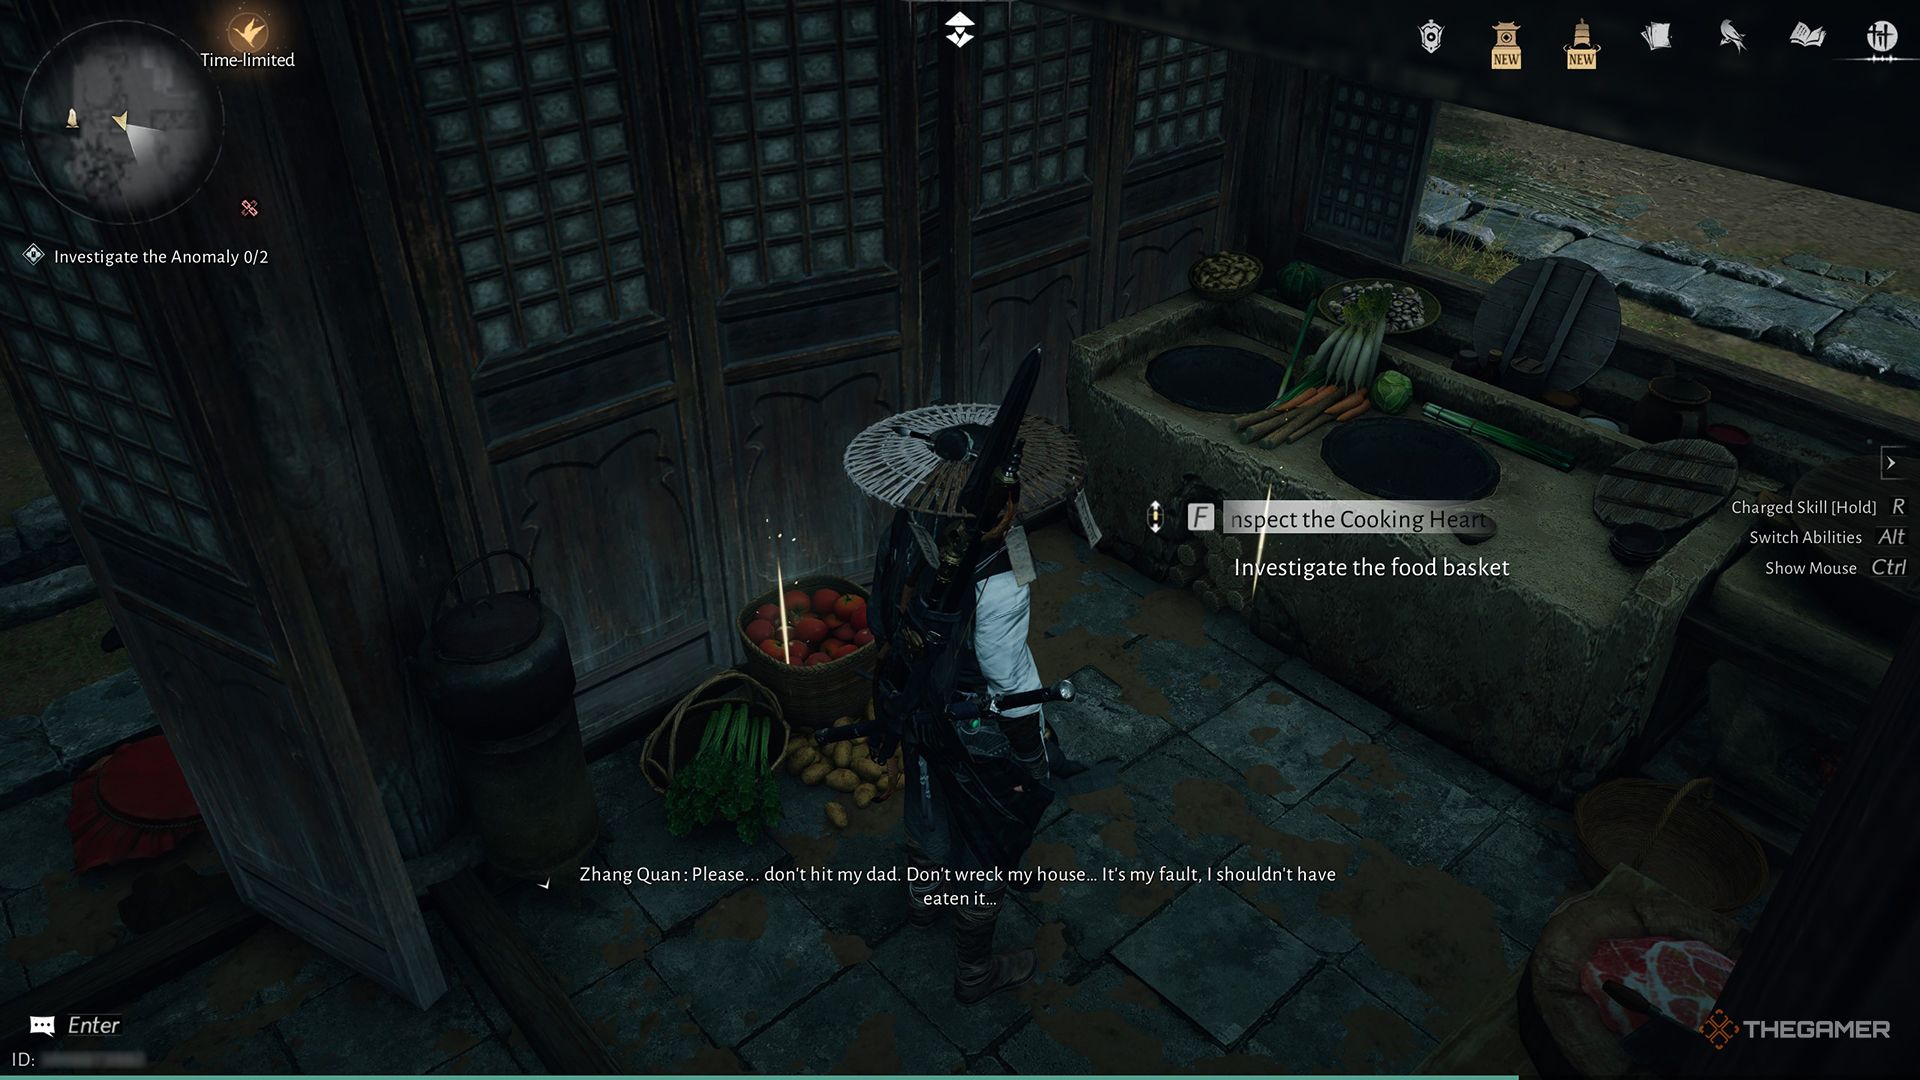
Wu hour (next day)- • Talk to the arguing couple by the burning shop, listen to nearby gossip, then eavesdrop on the shady broker.
- • Agree to the job, head to Tianjing Dock, and set the clock to Wu hour of the next day; talk to the foreman and follow the crew.
- • Inspect the spoiled food, examine the "body," follow the paper trail to the mourners, expose them, and defeat the four criminals.
- • Drag Lu San'er through town so he confesses, then debrief with Zhang Ankang before solving the dialogue puzzle below.
Tale of Gold Leaves: Volume 1
Immortal Tree- • Find the blind girl with three kids east of South Gate Avenue; talk to Zheng Ran and follow her home.
- • Ask neighbors about her father, return to Zheng Ran, then visit the Immortal Tree and read the placard.
- • Chase the rooftop thief until he tires, question the boy about the gold leaf, report to Zhou Ergou, then speak with the elder at the tree.
Strife in Every Corner (final)
Head to the Elder Host's home, listen to the exchange, attempt to return the coin bag to Zhang Ankang, then report back to the home to close Phase 1.
Side stories for white leaves (6)
Complete any six listed- •Peeking on the Wall: Use Meridian Touch to pull the thief down.
- •Trouble at Every Turn: Defeat two thugs, then heal Fu Wenshu in the mini-game.
- •Peril at the Pier: Beat the thugs or win Gift of Gab.
- •No Rest for the Righteous: Survive three waves of thugs.
- •The Helping Hand: Trail the thief, freeze with Meridian Touch, return stolen goods, escort the girl home.
- •Heart of Malice: Wind Sense the footprints, beat the thugs, bring the girl back.
Phase 2
Lights Flicker in Every Home (One Leaf One Life)
Two new volumes, five of seven side stories, and the Lights Flicker finale.
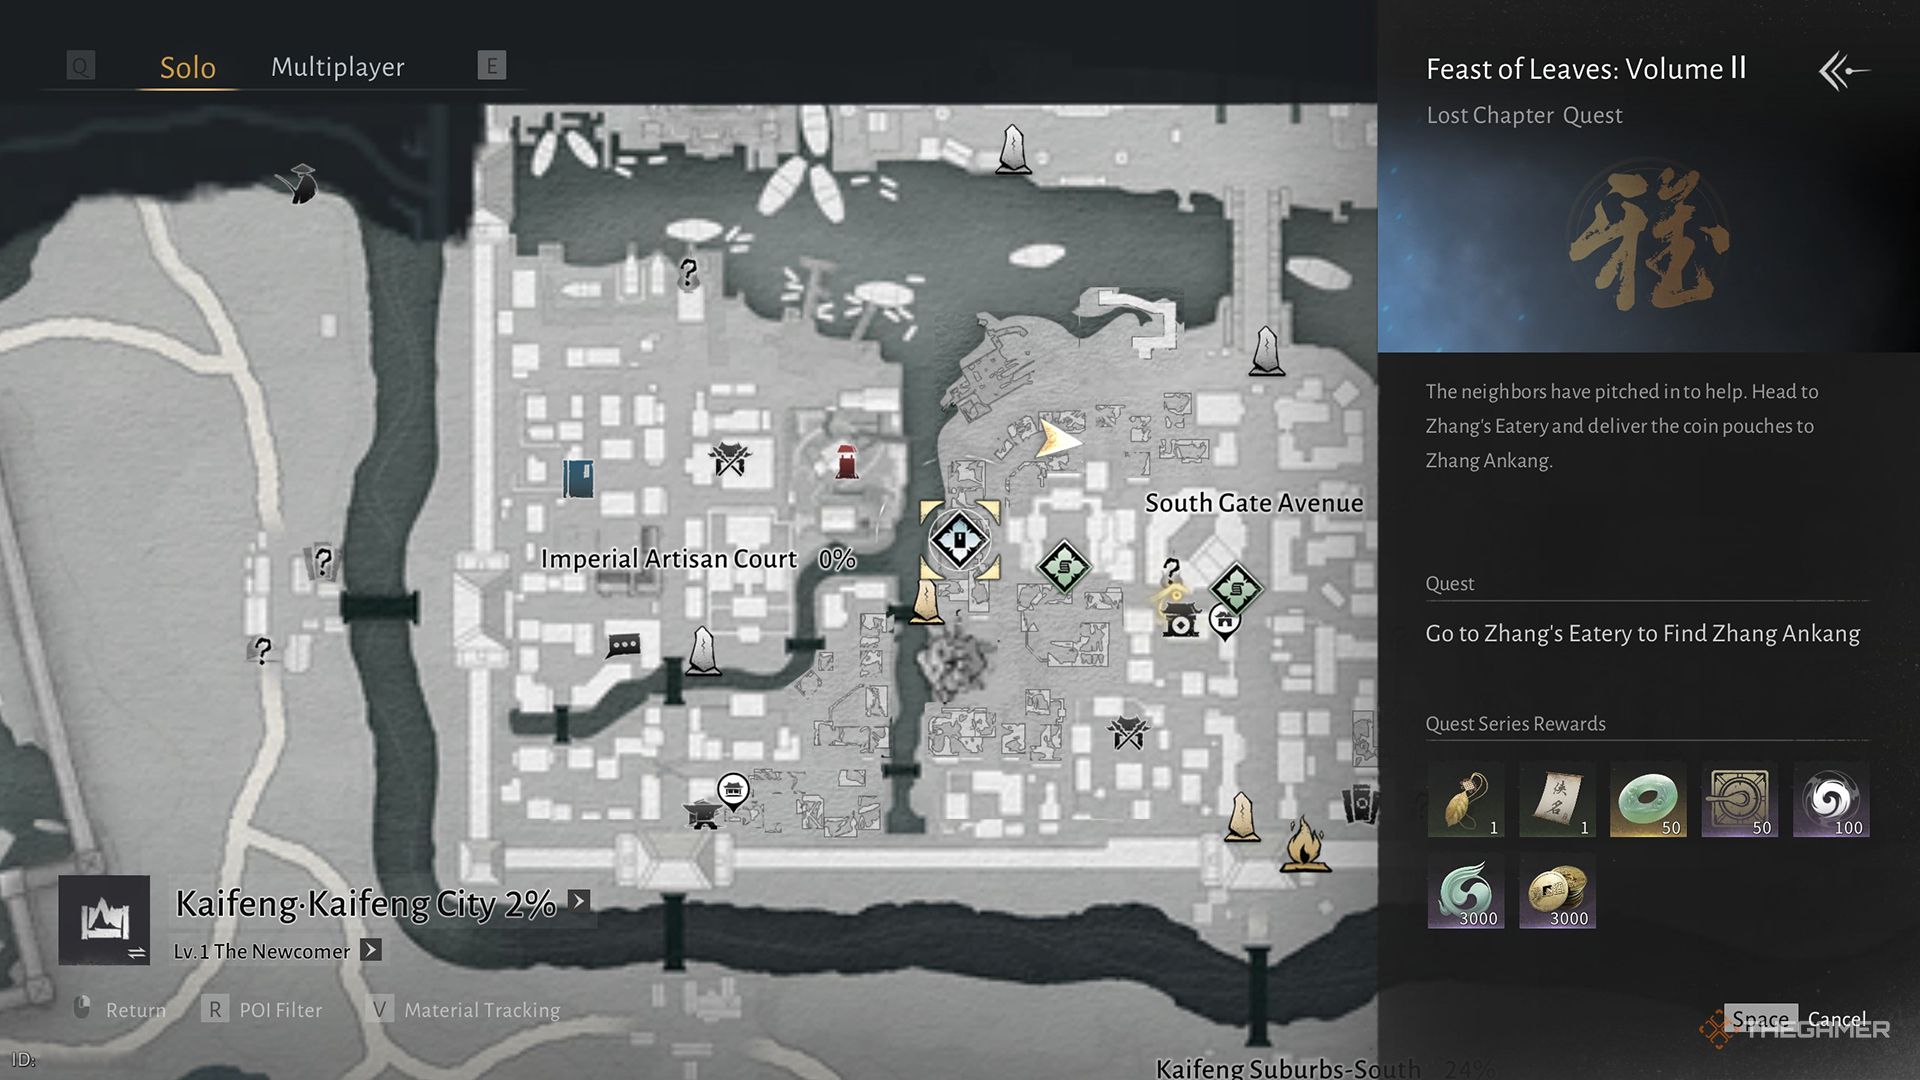
Feast of Leaves: Volume 2
You hour- • Revisit Zhang's Eatery, talk to Liu Xian, then meet Zhang Ankang at Tianjing Dock; follow him and return the coin bag.
- • Help cook Locust Leaf Noodles in the kitchen, inspect the recipe, then consult Wu Caifeng at Hopewell Academy.
- • Visit the Locust Tree at You hour to pick a leaf, return to Zhang, then find Lu San'er and beat his thugs.
- • Pay Zhou Juan for her story, brief Liu Xian, visit Jin's Jewelry for details, then report back to Zhang to wrap the volume.
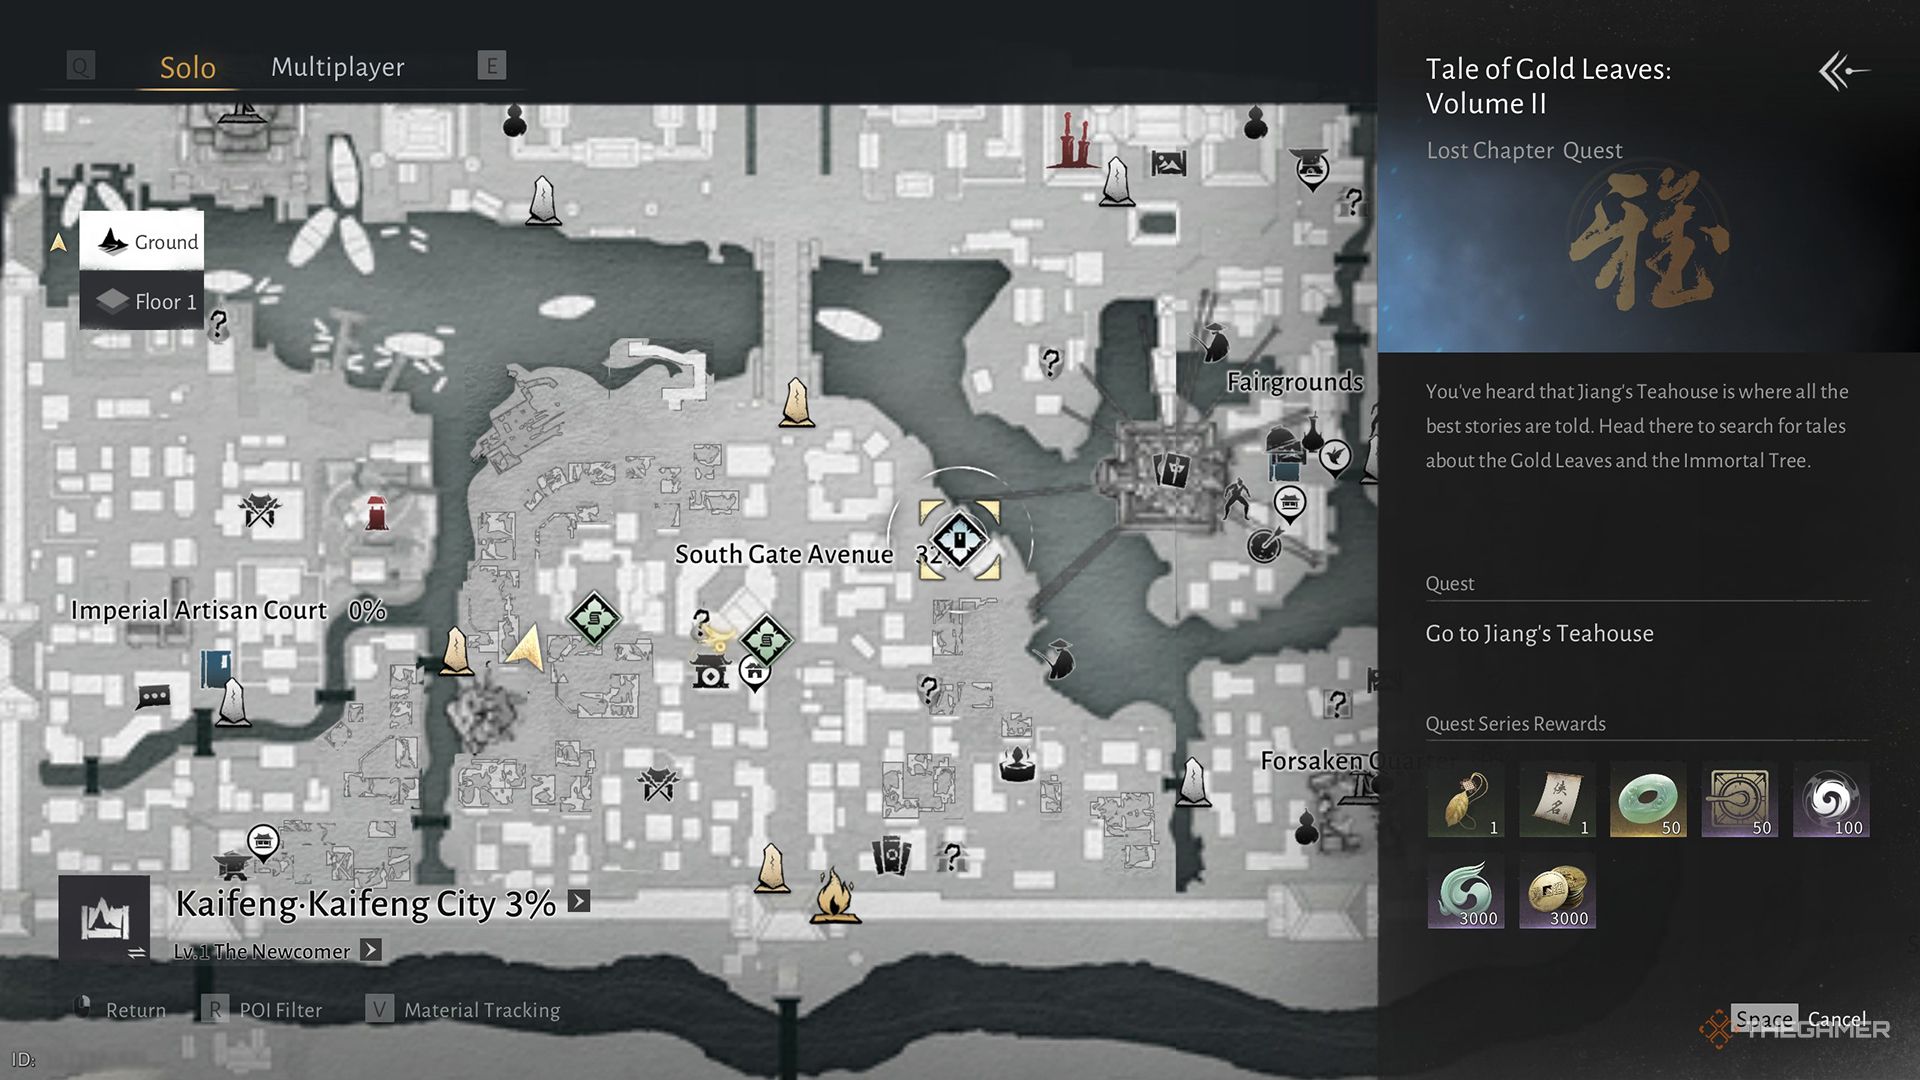
- • Start at Jiang's Teahouse with Pinggu Wen, read the storybook, then find Chen Xuewu at Hopewell Academy.
- • Locate the missing students: Zhen Lele and Hu Qiaoqiao in a west alley, Xu Xuan next door, Chen Wenwen in the building to the left.
- • Wait until night, sneak into the Patrol and Inspection Agency via the roof, use Wind Sense to avoid guards, gather the three clues.
- • Solve the puzzle below, then eavesdrop on Zheng Ran and Granny Liu in the east, wait until Chen hour, head to Willow Bank, use Tai Chi to get the leaf, and talk to finish.
Lights Flicker in Every Home (final)
Set time to You hour, listen to Liu Fen, follow the group to Zheng Ran, cook Locust Leaf Noodles while Liu Xian and Zhang Ankang talk, then speak with Zheng Ran to finish Phase 2.
Side stories for white leaves (5 of 7)
Do all seven to prep the epilogue- •A Step Above: Talk to Aunt Zhou and donate 1,000 coins.
- •The Watchful Eye: Speak to Zhou Qiqi, trail Tang Yue, then talk to the family.
- •Second Wind: Spam Meridian Touch to stop Chen Cheng from jumping.
- •Storybook: Drive off the thugs, feed Jiang Zhaoyue, and return.
- •Raw Leaf Porridge: Talk to Zhen Ping'an, get the prescription from Fu Wenshu in Willow Bank, return it near Hopewell Academy.
- •A Lamp and a Promise: Enter via the back window, read the diary, wait for Zi hour, then light the lamp.
- •Reflections on a Life: Read the stone tablet and shoot the four bells with your bow.
Phase 3
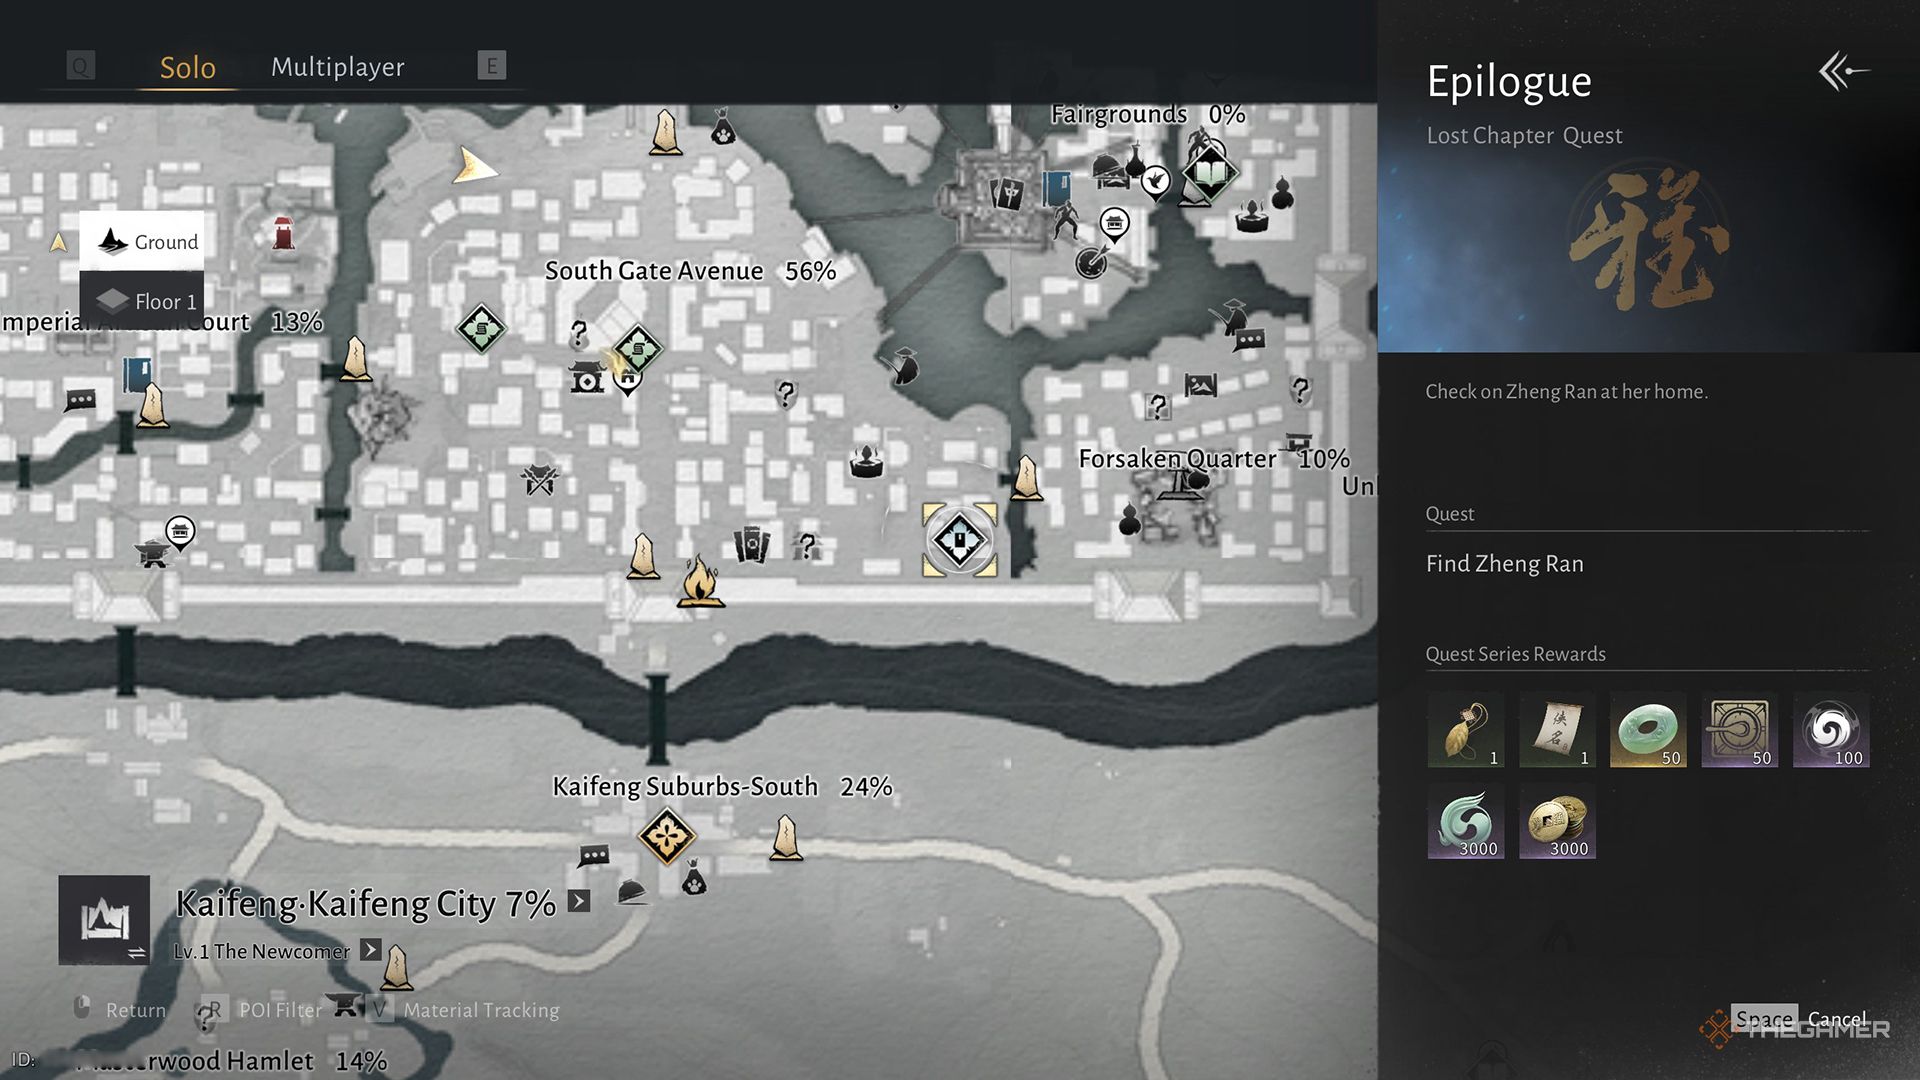
Huang Liang at Every Hearth (One Leaf One Life epilogue)
Finish all seven side stories, then close with the feast and epilogue.
Side stories (complete all 7)
Do these first- •Whispers of the Lotus Pastry: Speak to the bookkeeper.
- •Cuju: Talk to Ren Xiaoping and finish the minigame.
- •Return to Sender: Talk to Zhao Ya and read his letters aloud.
- •Feast of Fulfillment: Chat with Xu Yan and hand over the recipe book.
- •Heart Stealer: Talk to Zhou Ergou, use the Praise emote on Granny Chen, then report back.
- •Pear Blossoms of Yore: Talk to Wu Caifeng and give her a Hemostatic Powder.
- •A Tearless Farewell: Speak to Chen Mei, use Celestial Seize to steal the blush, give it to Zhong Wenping, then talk again.
To Feast and Forget
Return to Zhang's Eatery, talk to Zhang Ankang and Zheng Ran, then skip to You hour on the next day. Go to the feast at Tianjing Dock, defeat the thugs that arrive, and let the cutscene play out.
Huang Liang at Every Hearth (epilogue)
Visit Zheng Ran's house and eavesdrop, then head back to the Immortal Tree to listen to Ren Xiaoping. This closes One Leaf, One Life and awards the Gold Leaf accessory and the Gold Leaf Warrior title.
Want more Lost Chapters? This Where Winds Meet One Leaf One Life guide pairs well with the Woven with Malice walkthrough, plus our tier lists and builds.